How to Darken Grout that is Too Light: Grout is an essential component in tile installations, providing stability, support, and a finished appearance. However, if the grout turns out too light after application, it can throw off the desired aesthetic of your tiled surface.
Fortunately, there are ways to darken the grout and achieve your desired look. This article will walk you through the step-by-step process of darkening grout that is too light.early finder
Materials and Tools Needed
- Grout colorant or grout dye
- Latex or nitrile gloves
- Safety goggles
- Mask
- Small paintbrush or sponge applicator
- Clean, damp cloth or sponge
- Bucket of clean water
- Mild detergent (optional)
Step-by-Step Guide to Darkening Grout
Step 1: Choose the Right Grout Colorant
You’ll need a grout colorant or grout dye to darken your grout. These products are designed to penetrate and bond with grout, providing a new color lasting for years. When choosing a grout colorant, look for a water-based, non-toxic product resistant to water, stains, and UV light. Select a shade darker than your current grout color to achieve the desired effect.

Read Also: 6 Best Ways to Drain a Tooth Abscess at Home
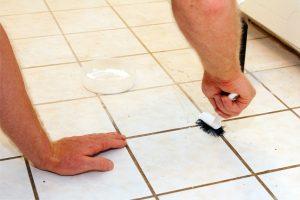
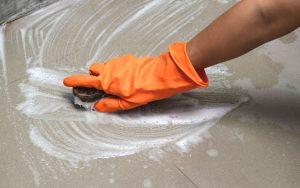
Step 2: Clean the Grout
Before applying the grout colorant, thoroughly clean the grout to ensure optimal adhesion. Remove dust, dirt, or grease using a mild detergent and a stiff-bristled brush. Rinse the area with clean water, and allow it to dry completely before proceeding.
Step 3: Protect the Surrounding Area
Cover any surfaces adjacent to the grout lines, such as tiles or countertops, with painter’s tape to protect them from the grout colorant. It’s also essential to wear latex or nitrile gloves, safety goggles, and a mask while working with grout colorant to protect yourself from exposure.
Read Also: 8 Steps to Delete Photo Albums on iPhone
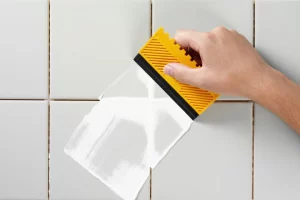
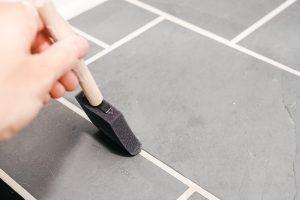
Step 4: Apply the Grout Colorant
Shake or stir the grout colorant well before using it. Apply the colorant evenly along the grout lines using a small paintbrush or sponge applicator. Be careful not to apply too much colorant, as it may seep onto the tiles. Work in small sections to ensure you can remove excess colorant before it dries.
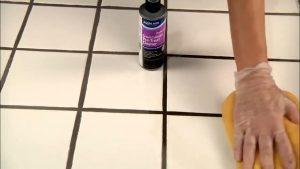
Step 5: Remove Excess Colorant
After applying the colorant to a small section, use a clean, damp cloth or sponge to wipe away any excess colorant from the tiles. Be sure to rinse the cloth or sponge frequently in a bucket of clean water to prevent smearing the colorant. Work quickly, as grout colorant can be challenging to remove once it dries.Darken Grout that is too Light

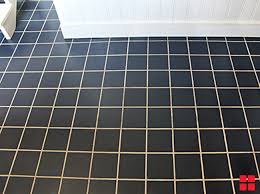
Step 6: Allow the Grout Colorant to Dry
Once you’ve applied the grout colorant to all the grout lines and removed any excess, allow the grout to dry according to the manufacturer’s instructions. This usually takes around 24 hours but can vary depending on the product used and environmental conditions.
Step 7: Seal the Grout (Optional).
If desired, apply a grout sealer after the colorant has dried to protect the grout from stains and dirt. This step is optional, as many grout colorants already provide stain resistance. If you choose to seal the grout, follow the manufacturer’s instructions for the sealer product.
Read Also: 6 Steps to Change Name on Airpods
How to darken grout with oil
Darkening grout with oil is not recommended, as it can lead to staining, discoloration, and potentially weakening the grout over time. Oils may also attract dirt and dust, causing your grout to become dirty and difficult to clean. Instead, it’s best to use a grout colorant or grout dye specifically designed for this purpose, as mentioned in the previous step-by-step guide.
However, if you’re set on using oil as a temporary solution, follow these steps with caution:
Materials Needed:
- Linseed oil or mineral oil (note that this is not a permanent solution)
- Small paintbrush
- Clean, dry cloth
- Latex or nitrile gloves
- Safety goggles
Step-by-Step Guide to Darkening Grout with Oil
Step 1: Protect Yourself and the Surrounding Area
Wear latex or nitrile gloves and safety goggles to protect your skin and eyes from contact with the oil. Cover any surfaces adjacent to the grout lines, such as tiles or countertops, with painter’s tape to protect them from the oil.

Read Also: 4 Tips to Shrink Hemorrhoid Skin Tag
Step 2: Clean the Grout
Before applying the oil, thoroughly clean the grout to ensure optimal absorption. Remove dust, dirt, or grease using a mild detergent and a stiff-bristled brush. Rinse the area with clean water and allow it to dry completely before proceeding.
Step 3: Apply the Oil
Using a small paintbrush, carefully apply a thin linseed or mineral oil layer along the grout lines. Avoid applying too much oil, as it may seep onto the tiles or cause uneven darkening.

Step 4: Remove Excess Oil
After applying the oil to a small section, use a clean, dry cloth to wipe away any excess oil from the tiles gently. Be sure not to press too hard, as this may also remove the oil from the grout.
Read Also: How Old Do You Have to Get a Debit Card
Step 5: Allow the Oil to Dry.
Allow the oil to dry according to the manufacturer’s instructions, which may take several hours or longer, depending on the type of oil used.
Remember that darkening grout with oil is not a long-term solution and may require frequent reapplications to maintain the desired appearance. The oil may also attract dirt and dust, making the grout challenging to clean. Consider using a grout colorant or grout dye for a more permanent and effective solution, as described in the previous guide.
Darkening grout that is too light is a simple and cost-effective way to achieve your desired aesthetic without removing and replacing the existing grout. With the right tools and materials, you can quickly transform the appearance of your tiled surface. Following this step-by-step guide, you can confidently tackle darkening your grout and enjoy a renewed, polished look for your tile installation. Remember to practice safety while working with grout colorants and be patient to ensure optimal results. With your newly darkened grout, your tiles will have the finished appearance you’ve always envisioned.
Read Also: 6 Steps to Pierce Your Nose
Share This Post:


