How to Make 360 Virtual Reality Video: Learn how to create captivating 360 virtual reality videos with this comprehensive guide. Discover the step-by-step process, from capturing footage with a 360 camera to editing and sharing your immersive videos. Gain insights into the best practices for shooting in 360 degrees, stitching together footage, adding special effects, and optimizing your content for virtual reality platforms. Unleash your creativity and embark on a journey into 360 VR video production today.early finder
Equipment for 360 VR Video Production
To create a 360 VR video, you’ll need the following equipment:
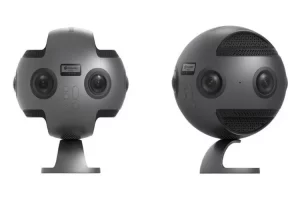
a. 360-degree camera: A camera designed to capture 360-degree footage is crucial. Various options are available on the market, such as the Insta360 One X2, GoPro MAX, and Ricoh Theta Z1.
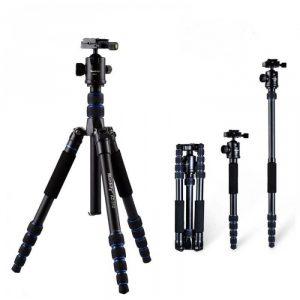
b. Tripod or monopod: To ensure stability during shooting, use a tripod or monopod with a 360-degree camera mount.Make 360 Virtual Reality Video
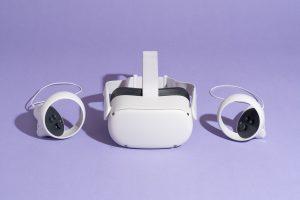
c. VR headset: To preview your footage and ensure it’s appropriately stitched, use a VR headset like the Oculus Quest 2 or HTC Vive.
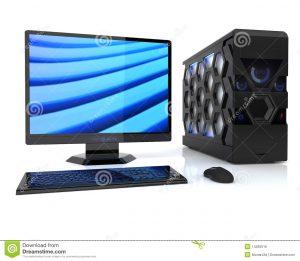
d. Powerful computer: Editing 360 VR videos requires significant processing power, so you’ll need a high-performance computer with a dedicated graphics card.
Read Also: 8 Steps to Delete Photo Albums on iPhone
2. Shooting Your 360 VR Video
Follow these steps when shooting your 360 VR video:
a. Choose a suitable location: Select a location with ample lighting and exciting visuals to create an engaging VR experience.
b. Set up your equipment: Position the 360-degree camera on a tripod or monopod, ensuring it’s level and stable. Be aware of the camera’s stitch line (where images from the camera’s lenses are combined) and minimize visible seams by keeping important subjects away.
c. Minimize camera movement: Although adding movement to your shots can be tempting, rapid camera movement can cause motion sickness for viewers. Keep the camera steady and limit movement as much as possible.
d. Direct the viewer’s attention: Since the audience can look in any direction, use visual and audio cues to direct their attention to critical elements in the scene.
3. Editing Your 360 VR Video
Once you have captured your footage, follow these steps to edit your 360 VR video:
a. Import and stitch the footage: Using specialized software like Insta360 Studio, Adobe Premiere Pro, or Final Cut Pro, import your footage and stitch it together to create a seamless 360-degree view.
b. Apply stabilization: To minimize camera shake or movement, apply stabilization to your footage using your editing software.
c. Edit and trim: Cut your footage and arrange the clips in your desired sequence. Be mindful of the viewer’s comfort, ensuring smooth transitions and not too disorienting.
d. Add titles, graphics, and effects: Enhance your video with titles, graphics, and visual effects, ensuring they are correctly positioned in the 360-degree space.
e. Optimize audio: Edit and mix audio to create an immersive soundscape, considering spatial audio techniques to enhance the viewer’s experience.
Read Also: 4 Methods to see blocked messages on iPhone
4. Exporting and Distributing Your 360 VR Video
Once your video is edited, follow these steps to export and distribute your content:
a. Export your video: Export your video using the appropriate settings and format for VR platforms, such as an MP4 file with H.264 or H.265 codec and a high bitrate.
b. Upload to VR platforms: Distribute your video by uploading it to popular VR platforms such as YouTube VR, Facebook 360, or Vimeo 360.
c. Promote your content: Share your video on social media, blogs, and other online channels to attract viewers and grow your audience.
Read Also: 6 Steps to Change Name on Airpods
How to make vr video for youtube:
Creating a VR video for YouTube involves a few key steps, including recording, editing, and uploading the video with the appropriate metadata. Here’s a step-by-step guide to help you through the process:
- Get a suitable 360-degree camera: To create a VR video, you’ll need a 360-degree camera to capture spherical videos. Popular options include the Insta360 One X2, GoPro MAX, and Ricoh Theta V. These cameras capture video from every angle, allowing for an immersive viewing experience.
- Set up your scene: Choose a location with exciting visuals and ample space for your camera setup. Place the 360-degree camera on a tripod or mount, ensuring it’s stable and positioned at the desired height.
- Record your video: Press record on your 360-degree camera and capture the desired footage. Remember that VR videos should be engaging and interactive, allowing viewers to explore the environment.
- Edit your video: Import the footage into compatible editing software like Adobe Premiere Pro, Final Cut Pro X, or Insta360 Studio. Some cameras come with editing software, which can also be used. Trim, color-correct, and stabilize your footage as needed. You can also add titles, transitions, and effects to enhance the video.
- Export your video: When you’re happy with the edited footage, export the video in a format compatible with YouTube VR, such as MP4 or MOV. Select a high resolution (4K or higher) and a high bitrate to ensure optimal quality.
- Inject VR metadata: Before uploading your video to YouTube, you must add VR metadata to the file. This allows YouTube to recognize the video as a 360-degree video. You can use the “Spatial Media Metadata Injector” tool Google provides. Download the tool, open it, and load your video. Check the box for “My video is spherical (360)” and click “Inject Metadata.” Save the injected video file.
- Upload your video to YouTube: Sign in to your YouTube account and click the “Create” button in the top right corner. Select “Upload videos” and choose the video file with the injected metadata. Fill in the title, description, and tags, and choose a thumbnail.
- Publish your video: Once it has finished processing, click “Publish” to make it public. Your VR video is now available for viewers to watch and explore using VR headsets or by interacting with the video on their devices.
Remember to test the video playback on multiple devices and with a VR headset to ensure the quality and immersive experience are as intended.
Once you’ve successfully published your VR video on YouTube, there are a few additional steps you can take to optimize and promote your content.
Read Also: 5 Steps to Charge Apple Pencil 2
- Add end screens and annotations: Use YouTube’s end screen and annotation features to promote your other videos or channel, direct viewers to your website, or encourage them to subscribe. This can help increase engagement and drive traffic to your other content.
- Optimize video metadata: To improve search visibility and attract more viewers, optimize your video’s metadata, including the title, description, and tags. Use relevant keywords and phrases that people might use to search for content like yours. However, avoid keyword stuffing and focus on providing clear, informative descriptions.
- Share your video on social media: Promote your VR video on social media platforms like Facebook, Twitter, Instagram, and Reddit. Share the link to your video with a brief description and encourage your followers to check it out. Engaging with your audience and participating in relevant online communities can help increase your video’s visibility and reach.
- Collaborate with other creators: Reach out to other content creators within the VR and 360-degree video niche to collaborate or cross-promote each other’s content. This can help you tap into new audiences and expand your reach.
- Monitor your video’s performance: Keep track of your video’s views, likes, comments, and other engagement metrics using YouTube Analytics. This data can help you understand what resonates with your audience and inform your future content strategy.
- Engage with your audience: Respond to comments and questions on your video, and encourage viewers to share their experiences and feedback. Building a rapport with your audience can foster community and keep viewers returning for more.
- Keep creating and refining: As you produce more VR videos, focus on audience feedback and engagement metrics to identify what works and doesn’t. Continuously refine your content and production techniques to improve the quality and effectiveness of your videos over time.
By following these steps and consistently producing high-quality, engaging VR content, you can grow your YouTube channel and establish yourself as a prominent creator within the virtual reality space.
Read Also: How much is United Healthcare stock today
Conclusion
Creating 360 VR videos offers an unparalleled opportunity for immersive storytelling and engaging experiences. By investing in the right equipment, carefully planning and shooting your content, and utilizing effective editing techniques, you can craft a captivating 360 VR video that transports your audience into a virtual world. Embrace the challenge of this new medium and push the boundaries of creativity to provide viewers with a unique and memorable experience. As the VR industry evolves, staying up-to-date with the latest tools, techniques, and best practices will ensure your content remains relevant and appealing to audiences worldwide.
Share This Post:


