Learn how to add a printer to your Mac with our step-by-step guide. Follow these instructions to connect your printer wirelessly or via USB, install the necessary drivers, and start printing effortlessly from your Mac. Don’t let the printer setup process intimidate you—get your printer up and running on your Mac in no time!
How to add a printer to Mac
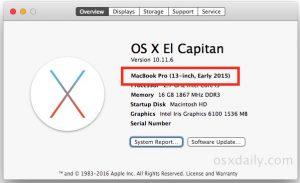
Step 1: Check compatibility
Before you start, it’s essential to ensure your printer is compatible with your Mac. Most printers these days will work with Mac computers, but it’s always best to check the manufacturer’s website to make sure.
Step 2: Connect your printer
The next step is to connect your printer to your Mac. Depending on your printer type, this may involve connecting a USB cable or setting up a wireless connection. Follow the instructions that came with your printer to connect it to your Mac.add printer to mac
Read Also: 8 Steps to Delete Photo Albums on iPhone
Step 3: Add the printer
Once your printer is connected to your Mac, you must add it to your list of printers. Here’s how:
- Click on the Apple menu in the top left corner of your screen and select “System Preferences.”
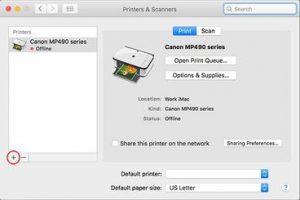
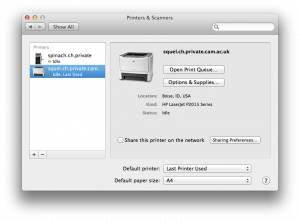
- Click on “Printers & Scanners.”
- Click on the “+” button at the bottom of the list of printers.
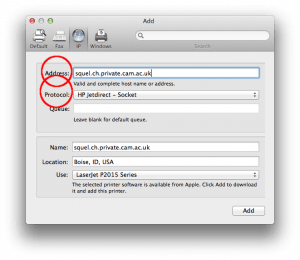
- Select your printer from the list of available printers. If your printer doesn’t appear in the list, click on the “Add Printer or Scanner” button and follow the on-screen instructions to add it.

- Once you’ve selected your printer, click on the “Add” button to add it to your list of printers.
Read Also: 6 Steps to reset tp link AC1750 Extender
Step 4: Test your printer
Once you’ve added your printer to your Mac, testing it to ensure it works properly is a good idea. Print a test page or document to ensure everything works as it should.

That’s it! Adding a printer to your Mac is a simple process that can be completed in just a few easy steps. If you have any issues or questions, consult the manufacturer’s website or contact their customer support team for assistance.
How to add Canon printer to Mac wireless
To add a Canon printer to a Mac wirelessly, follow these steps:
- Turn on your Canon printer and ensure it is connected to your wireless network.
- On your Mac, click on the Apple menu in the top left corner of your screen and select System Preferences.
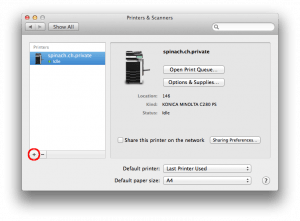
- In the System Preferences window, click on Printers & Scanners.
- Click the plus (+) button in the Printers & Scanners window to add a new printer.
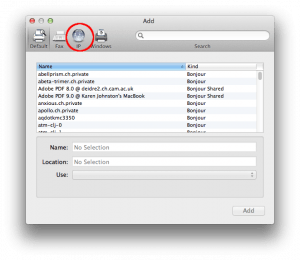
- Your Mac will now search for any available printers on your network. When your Canon printer appears in the list, select it and click on the Add button.
- If your Mac does not automatically install the necessary drivers, you will be prompted to download and install them. Follow the on-screen instructions to complete the installation.
- Once the installation is complete, your Canon printer should be added to your list of available printers on your Mac.
You can now print wirelessly from your Mac to your Canon printer.
Read Also: 6 Steps to Change Name on Airpods
How to connect Mac to hp printer with USB
Connecting a Mac to an HP printer with USB is a straightforward process. You can follow the steps below:
- Turn on your HP printer and ensure it is connected to your Mac with a USB cable.
- On your Mac, click on the Apple menu in the top-left corner of the screen and select “System Preferences.”
- In the System Preferences window, click on “Printers & Scanners.”
- Click the “+” button at the bottom of the printer list on the left-hand side of the window.
- Select your HP printer from the list of available printers and click “Add.”
- Your HP printer should now be listed in the “Printers & Scanners” window. You can now print to your HP printer from any application on your Mac.
Read Also: 4 Steps to Unblock on Snapchat
Conclusion
If your Mac does not recognize your HP printer, you may need to download and install the latest HP printer driver from the HP website. Once you have installed the driver, follow the steps above to connect your Mac to your HP printer with USB.
Share This Post:


