How to Sync Messages from iPhone to Mac: This article provides step-by-step instructions on how to sync messages from your iPhone to your Mac. Learn how to easily transfer text messages, iMessages, and attachments from your iPhone to your Mac, so you can keep your conversations in one place.
Sync Messages from iPhone to Mac is a helpful guide for Apple users who want to seamlessly access their text messages across all their Apple devices. With the integration of Apple’s Continuity feature, users can now receive, send, and reply to messages on their Mac, without the need to switch to their iPhone. Whether you are at home or at work, this article will show you how to set up and use this convenient feature, making your communication more seamless and efficient.
Read Also: How to Get 1k Followers on Instagram in 5 Minutes
How to Sync Messages from iPhone to Mac
Here’s a step-by-step guide to adjust your iPhone settings and sync messages from iPhone to Mac:
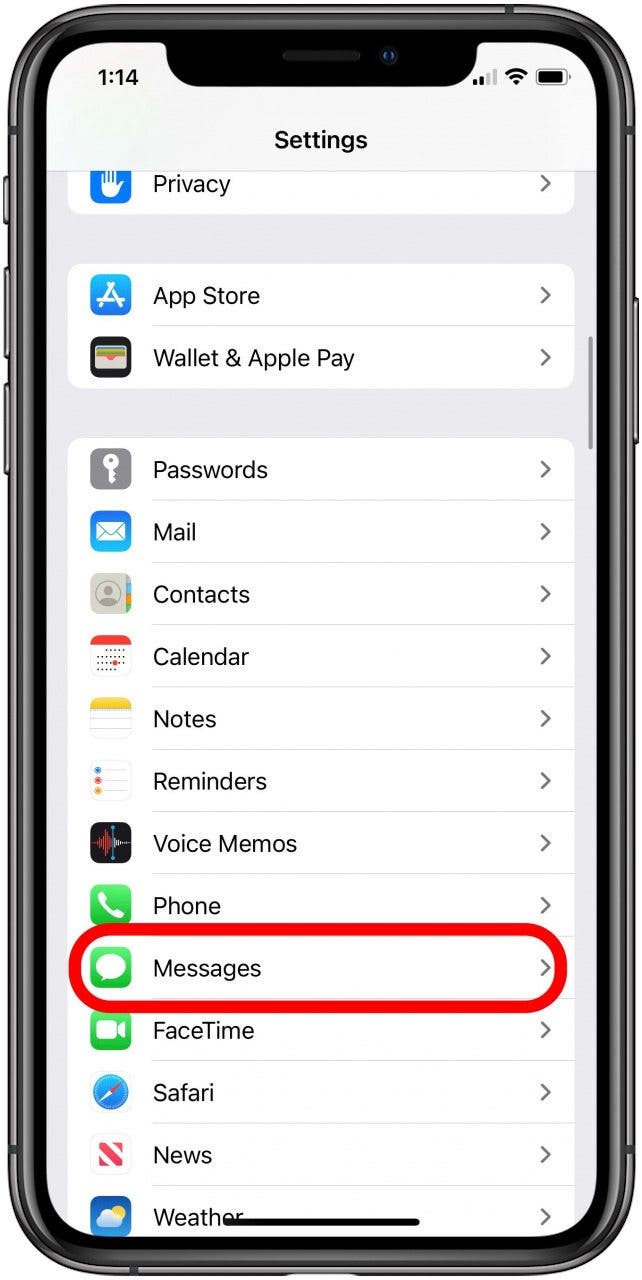
Step 1: Open the Settings app on your iPhone

Step 2: tap on ‘Messages.’
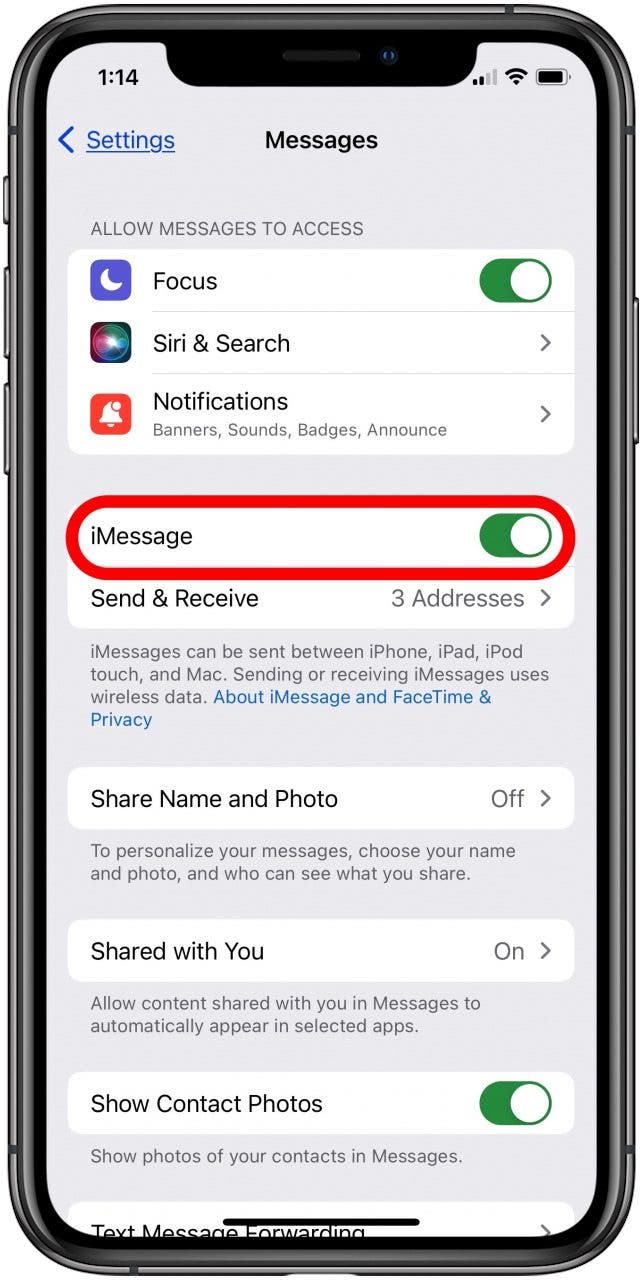
Step 3: Ensure that iMessage is turned on and wait for it to activate if necessary.Sync Messages from iPhone to Mac
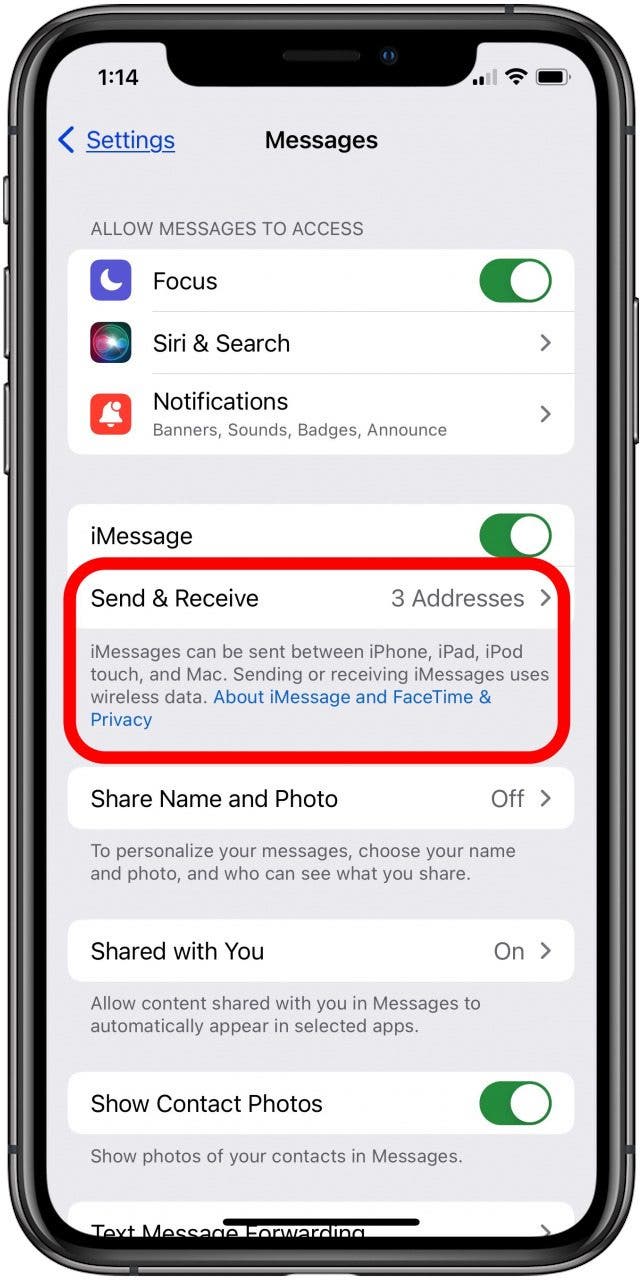
Step 4: Tap on ‘Send & Receive‘ and sign in with the Apple ID you use on your other Apple devices, if prompted to do so.
Step 5: In the ‘You Can Receive iMessages To and Reply From‘ section, make sure your phone number, Apple ID, and other email addresses used for iMessage are checked.
Step 6: Choose your phone number under ‘Start New Conversations From,’ unless you have a preferred email address.
Note your Apple ID displayed at the bottom for later use on your Mac.
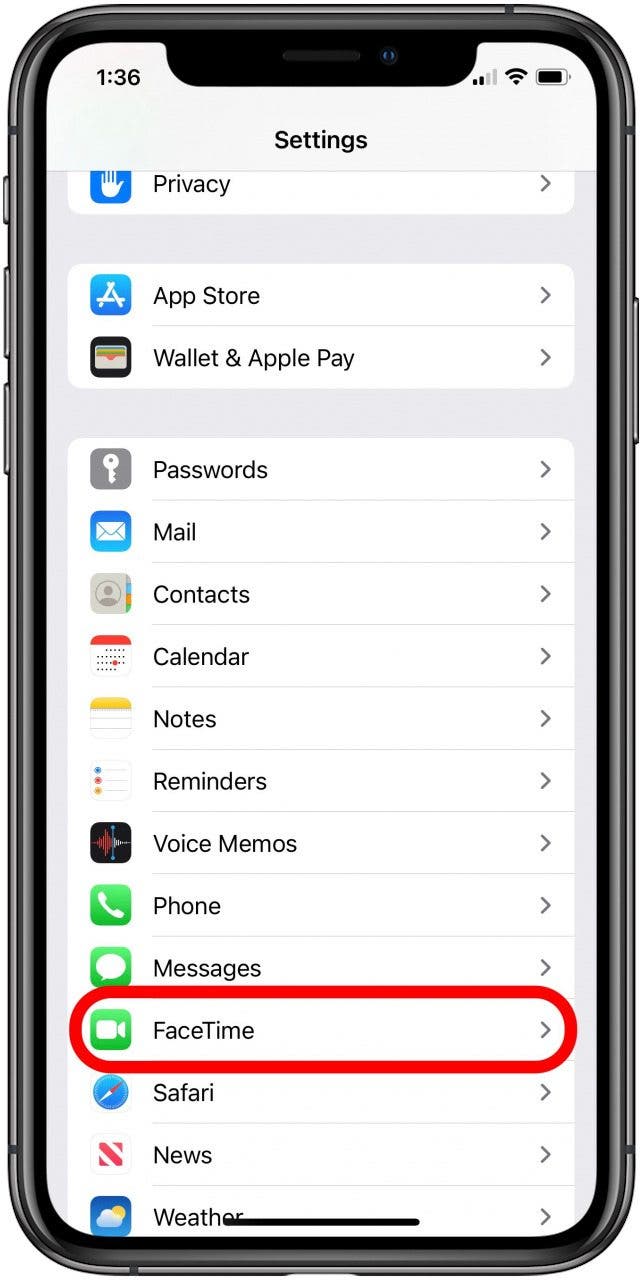
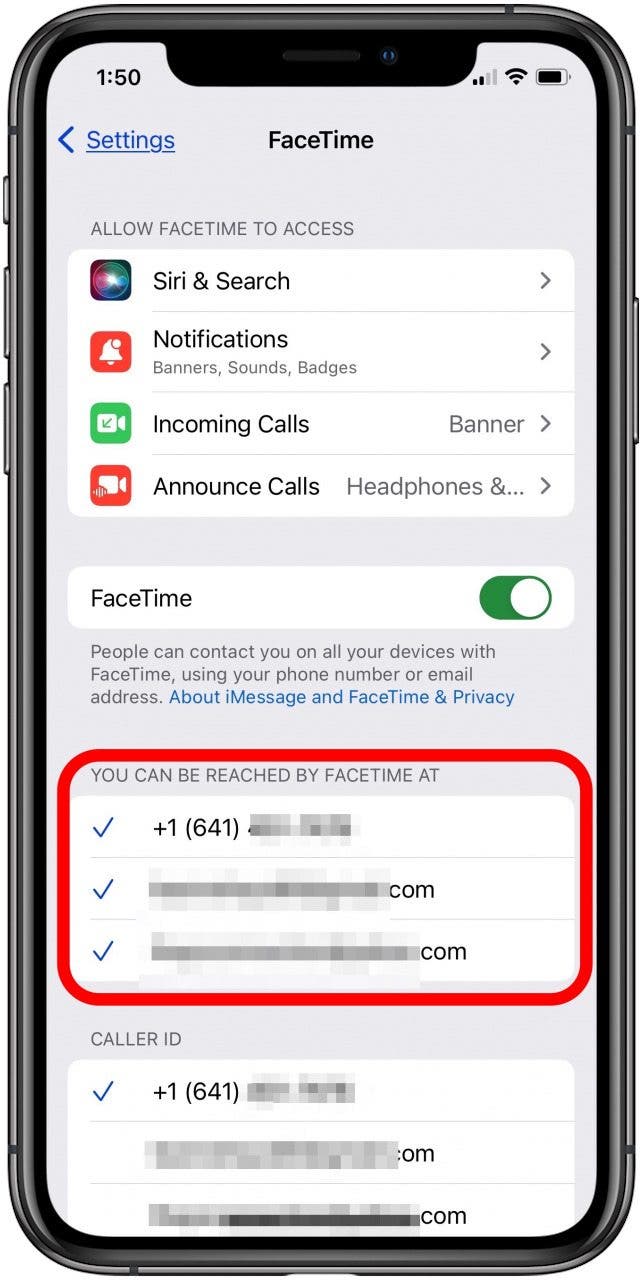
Step 7: Go back to the Settings app and tap on ‘FaceTime.’
Step 8: In the ‘You Can Be Reached by FaceTime At‘ section, ensure that your phone number and Apple ID are checked.
Read Also: How to View Likes on Instagram
How to Sync Messages from Mac to iPhone
To sync messages from Mac to iPhone follow these steps:
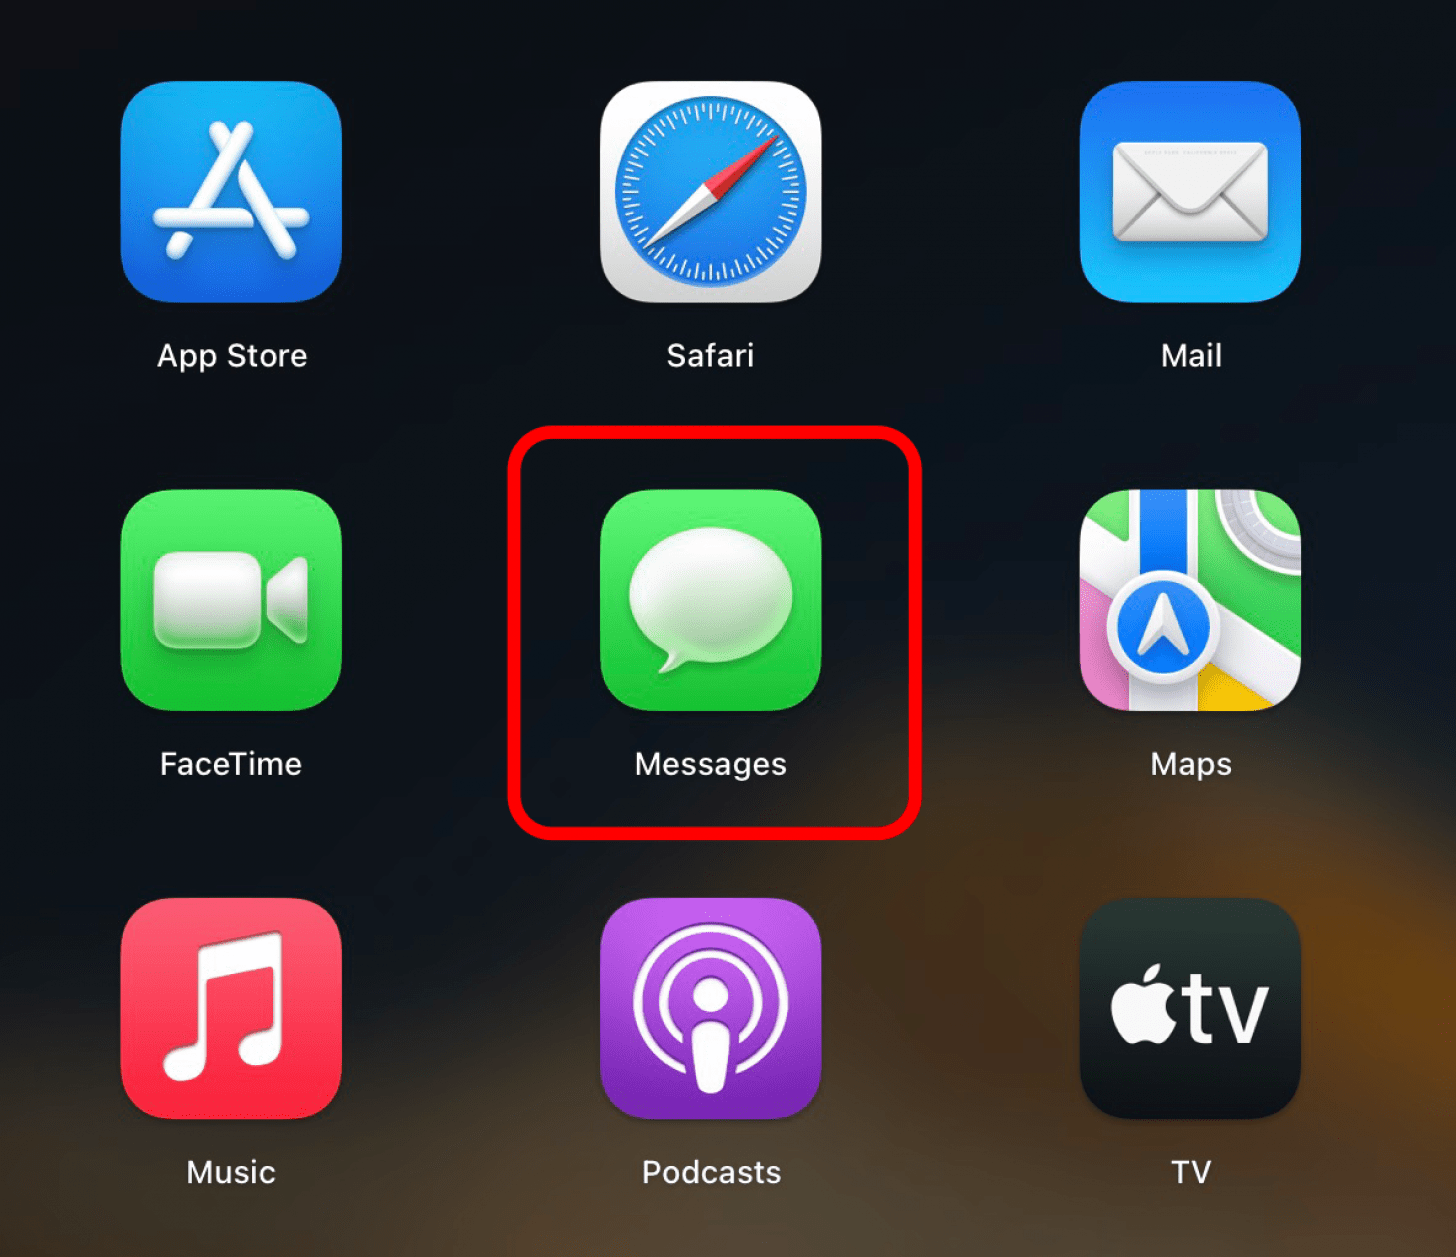
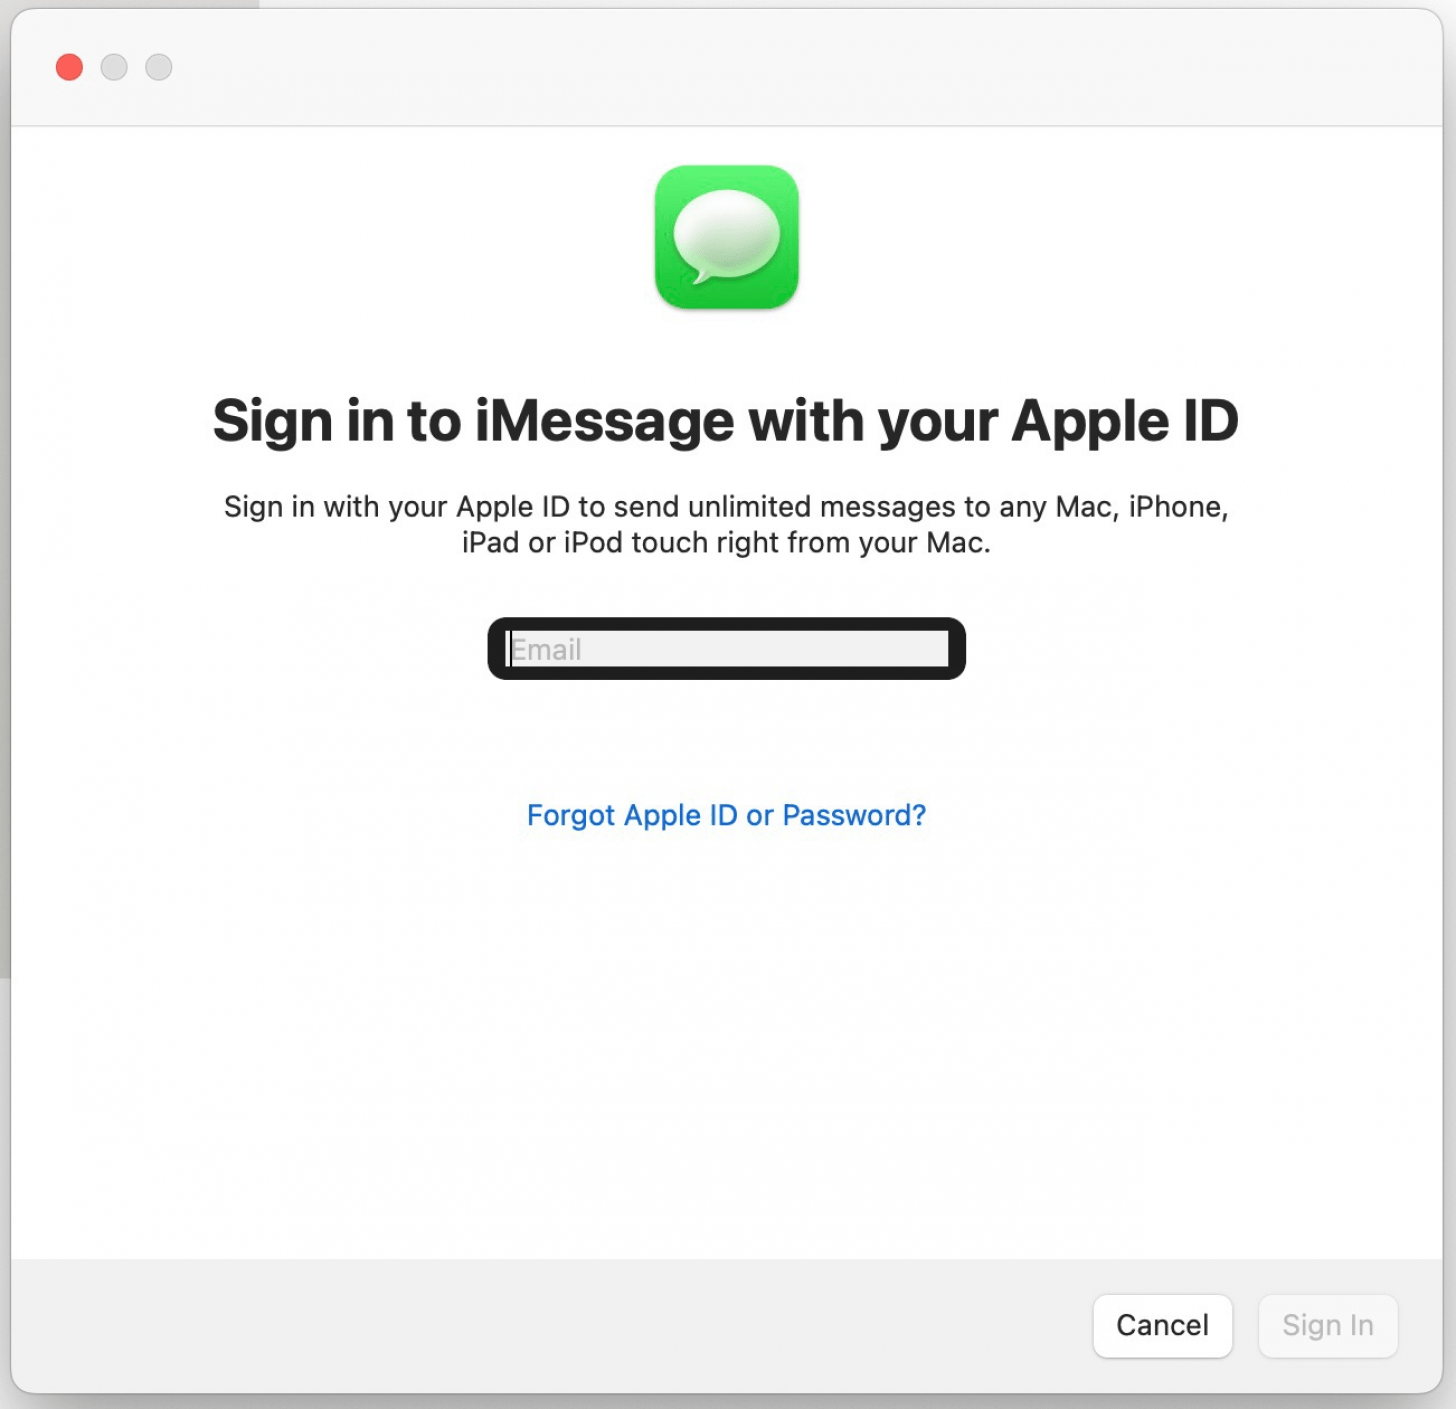
- Open the Messages app on Mac, which can be found in the Applications folder.
- Log in if prompted to do so.
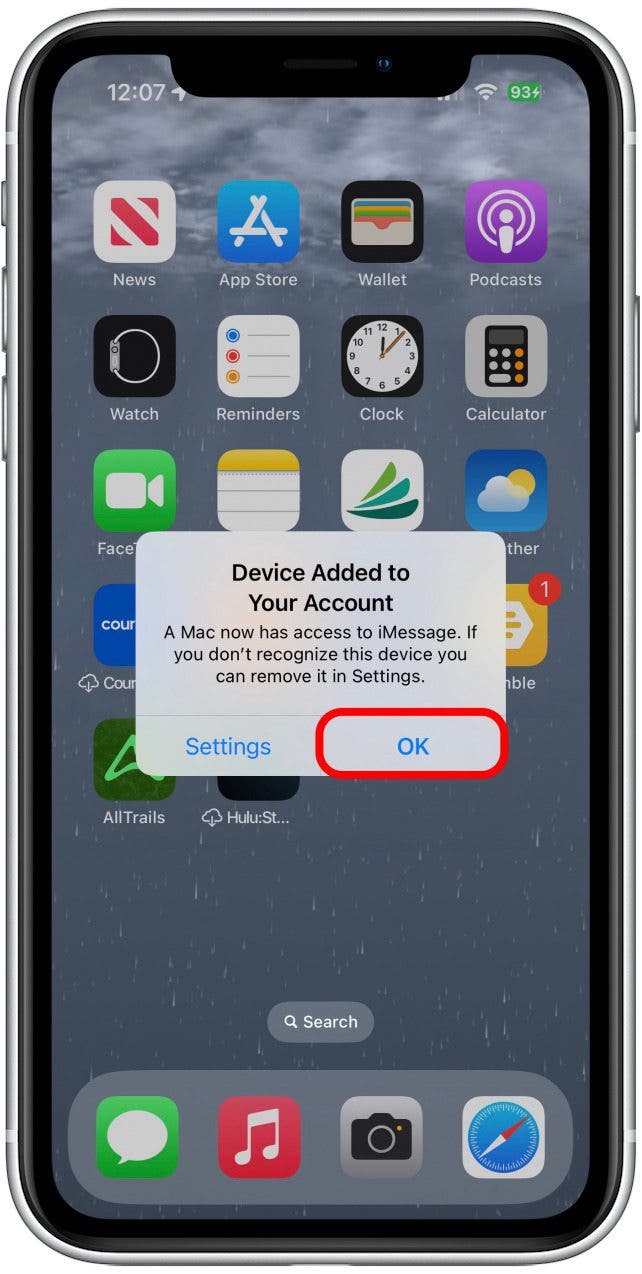
- On your iPhone, you will receive a message indicating that your Mac has been added to Messages. Tap “OK.”
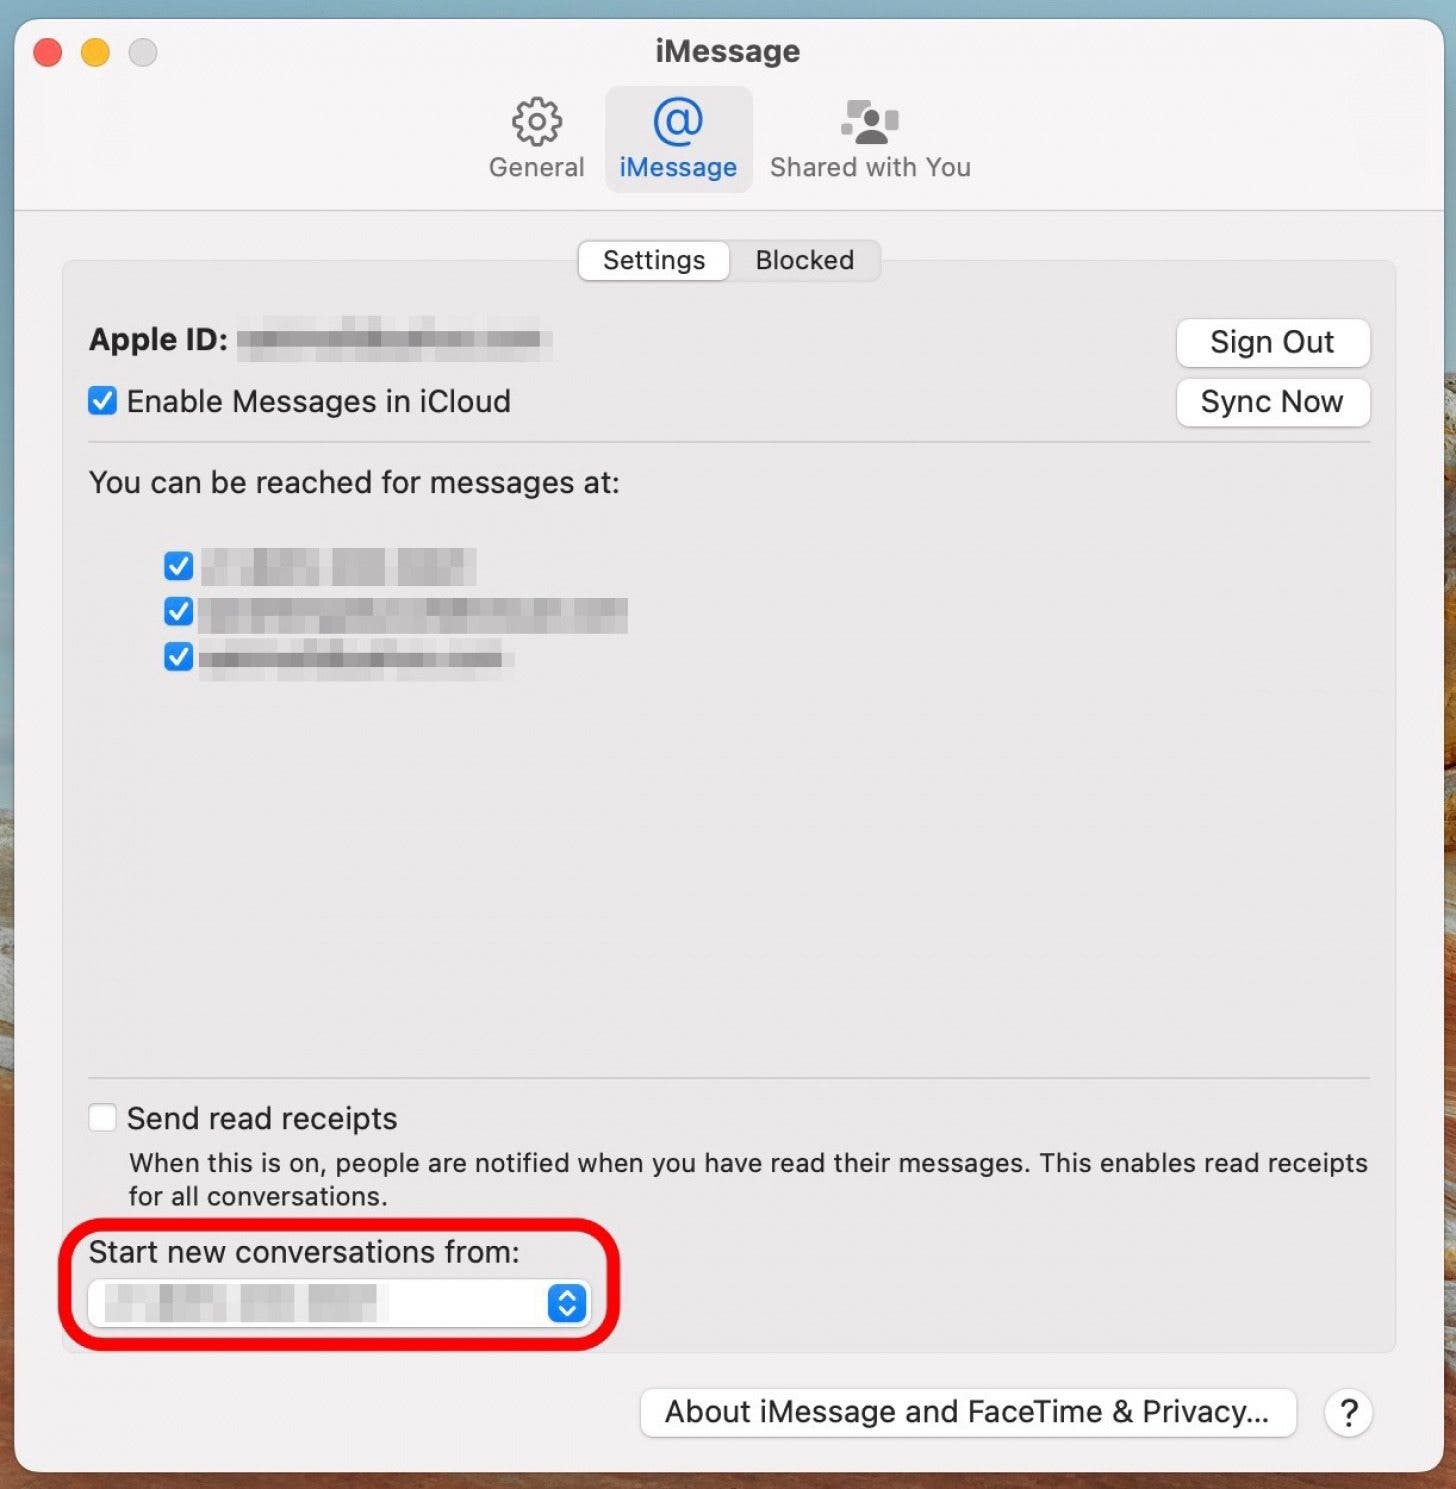
- Go to Messages on the menu, then click “Settings.”
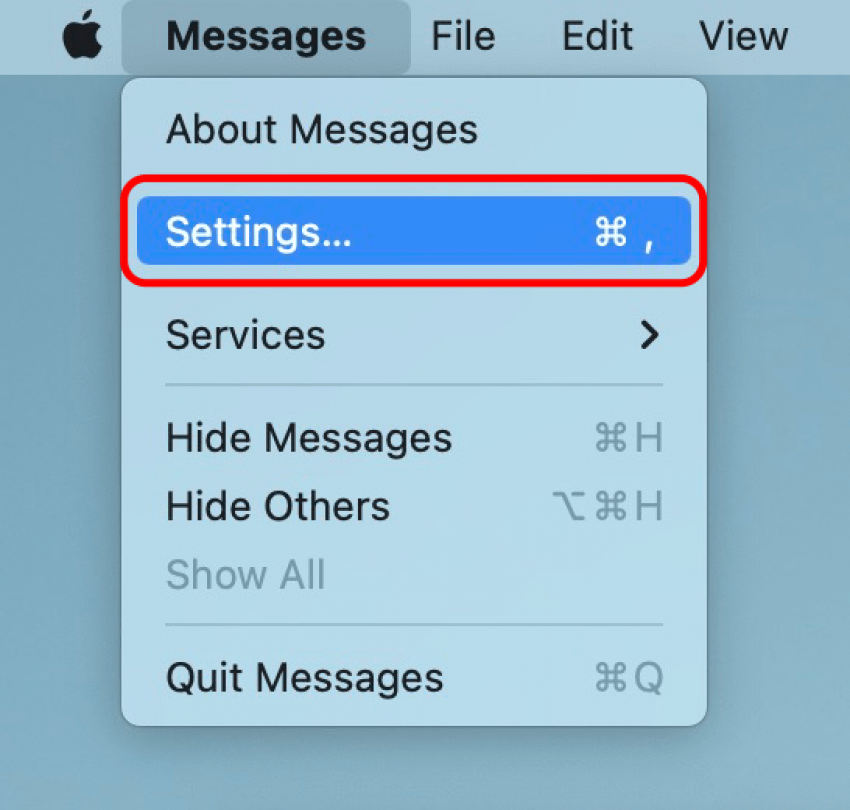
- In the pop-up box, select “iMessage” at the top.
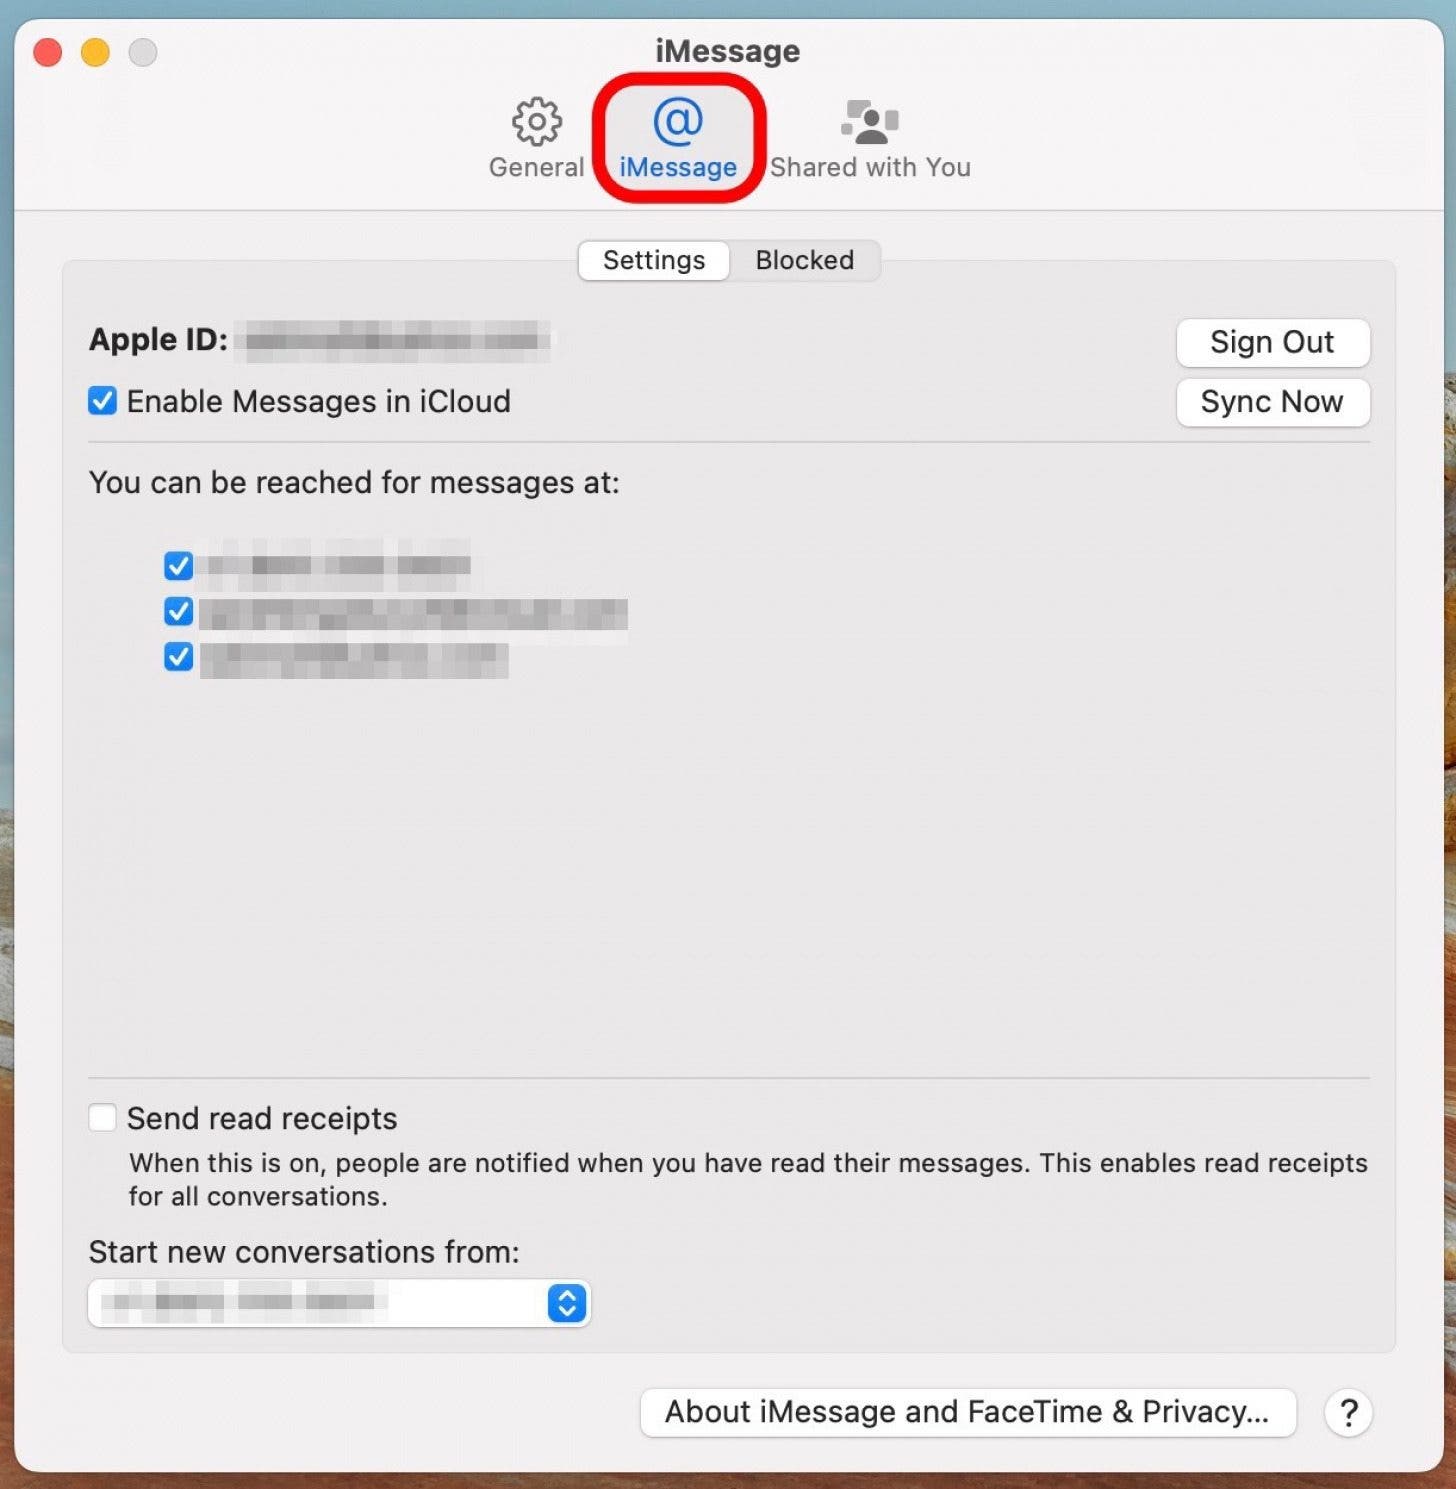
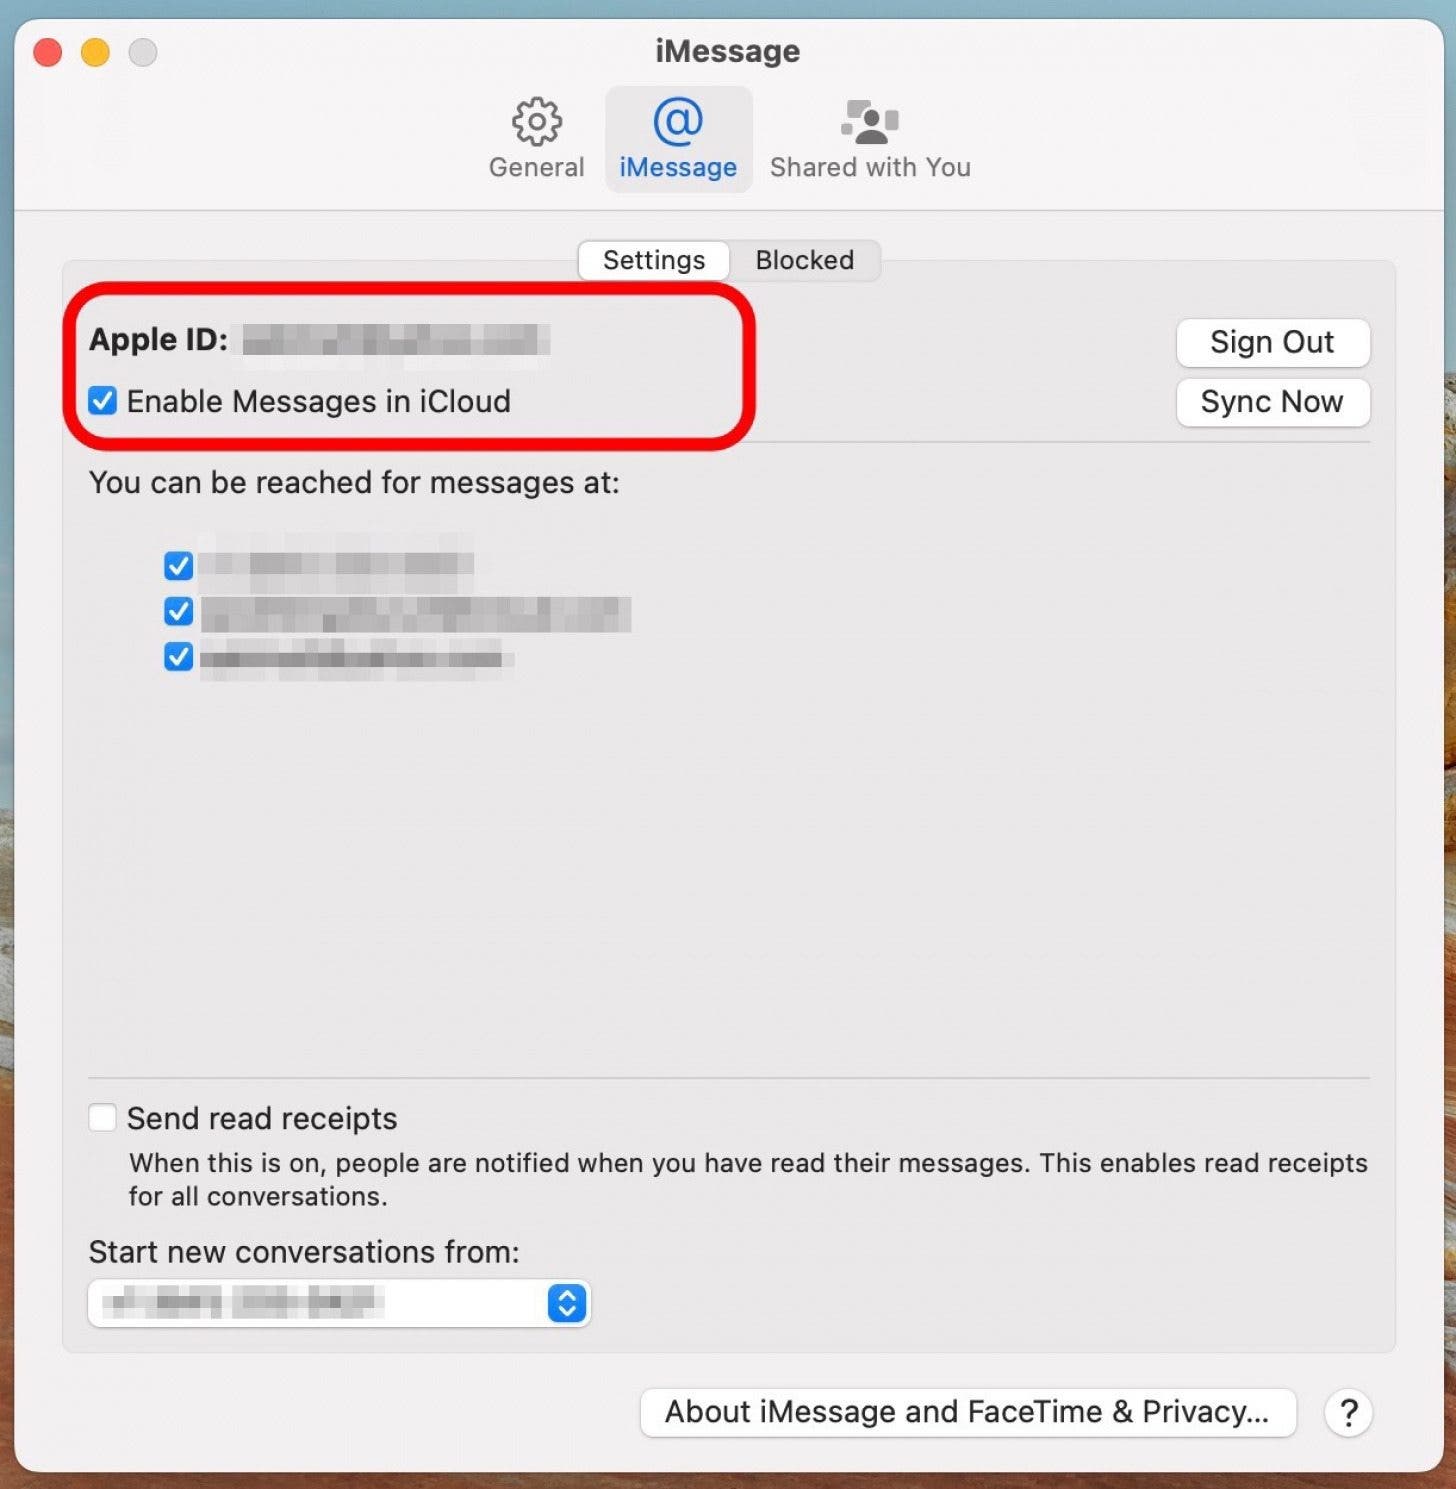
- Check that your Apple ID matches the one you are logged in with on your iPhone.
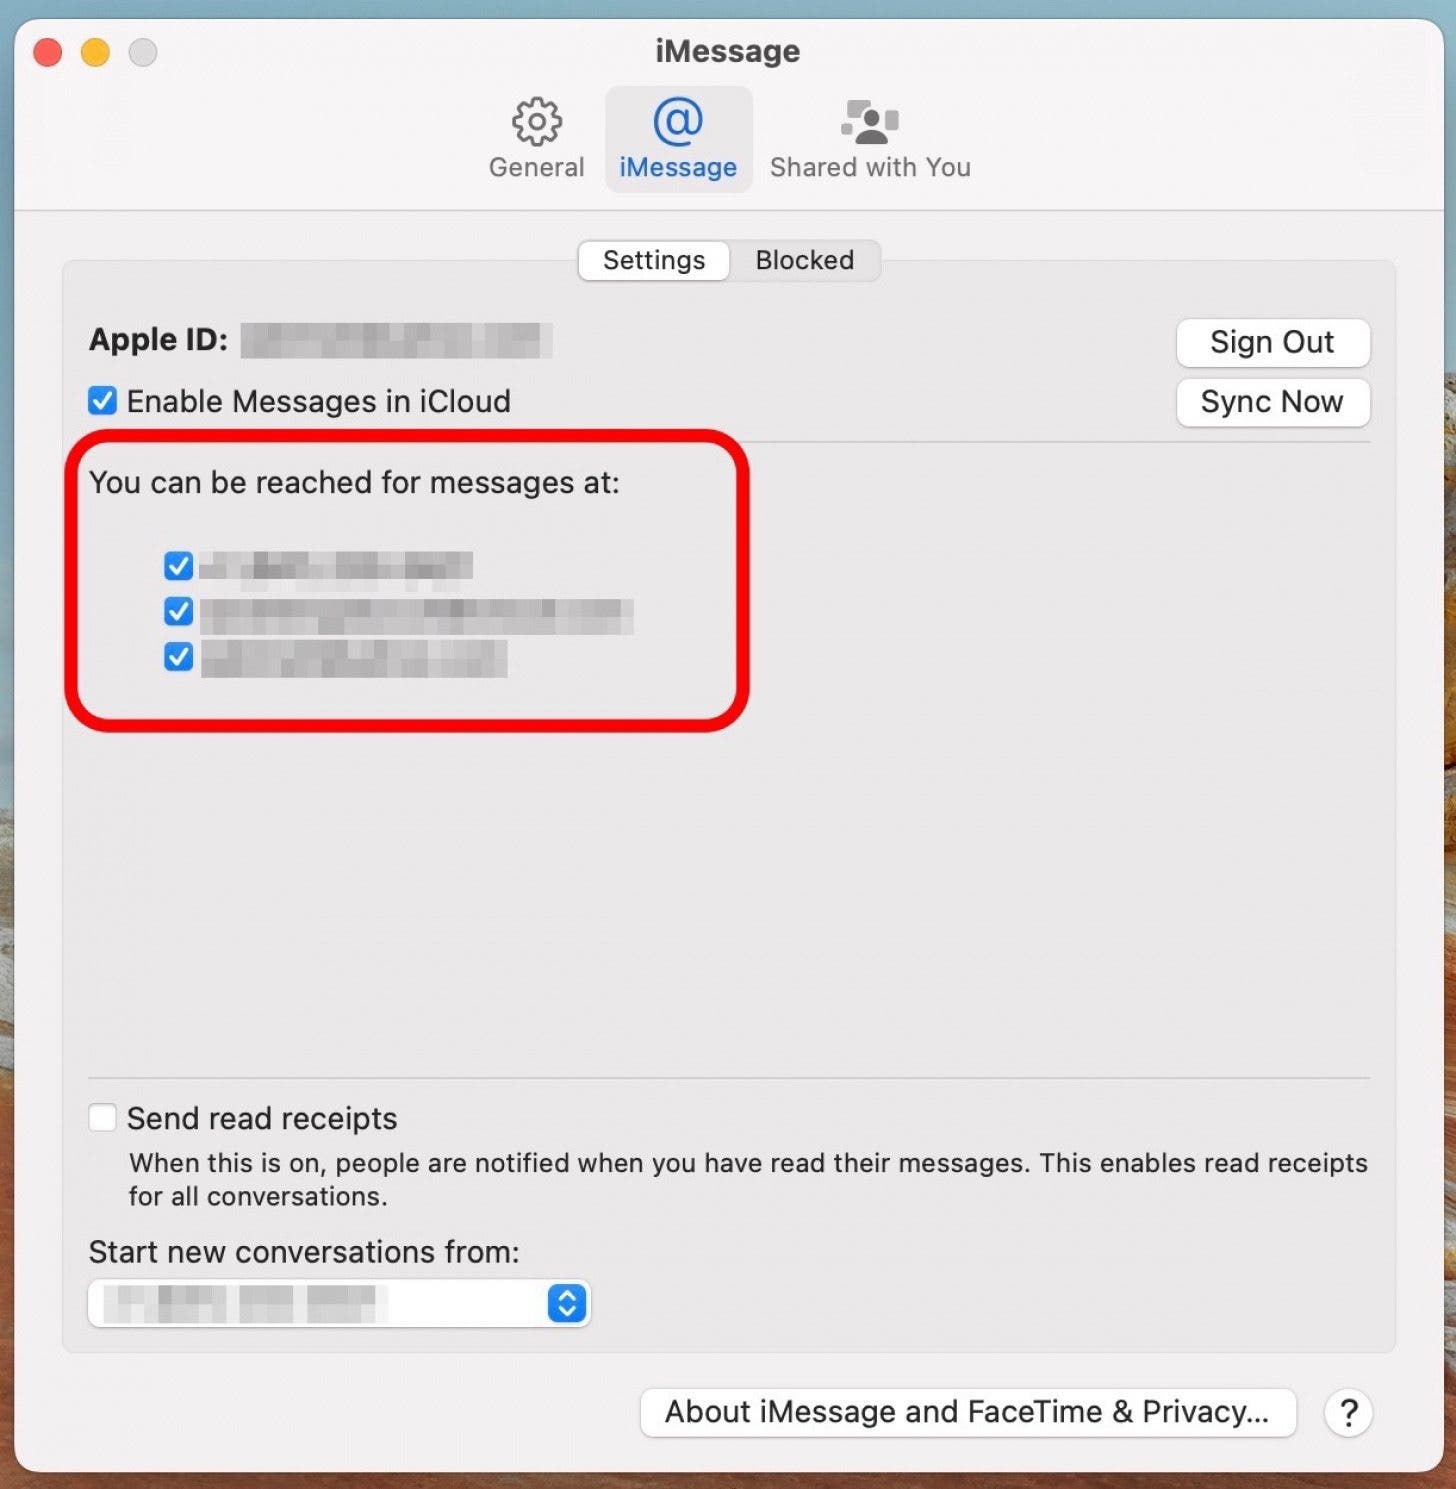
- In the “You can be reached for messages at” section, ensure that your phone number and all email addresses you use for messages (including your Apple ID email) are checked.
- In the “Start new conversations from” section, select the same option (phone number or email) that you chose on your iPhone.
Read Also: How to Find Apple Watch
Conclusion
In summary, syncing messages between your iPhone and Mac can greatly improve your communication efficiency and convenience. With Apple’s built-in features like Continuity and Handoff, or third-party tools like iMessage or AirDrop, you can easily transfer text messages, iMessages, and even attachments between your devices. Whether you’re working on your computer or need to respond to a message on the go, having your messages synced across all your devices can simplify your life and keep you connected.
Read Also: How to Reset Samsung TV
Share This Post:


